It’s been a while since I’ve had the Birch Trees die from Hello Bluebird and I’m really happy to have finally used them. The Birch Trees die has 4 individual barks and 7 leaves so it’s perfect for autumn cards but this time I used it for my a winter-themed card.
On this post, I’ll be sharing an easy way to create a snowy background using the Birch Trees die from Hello Bluebird. You can add this up to your winter cards ideas for your next project.
It doesn’t just suit the Christmas holiday but all through the winter season. A quick and versatile winter card idea, you can also use whatever stamp set you have in your stash.
To create this snowy background, all you need is a white gel pen, a midnight blue cardstock, a white cardstock, and a white glitter cardstock (I used a glitter foam sheet instead, which was only $2 from the Dollar shop).
First, cut the blue cardstock into 10×15 cm for the front panel. You can also use an A6 rectangular die cut if you have one. Using the Hello Bluebird die, cut the birch trees from the white cardstock and attach them onto the blue panel however you like.
You can space them out evenly, just like in my first sample or position them at the far ends just like in the second sample with the moon in the middle.
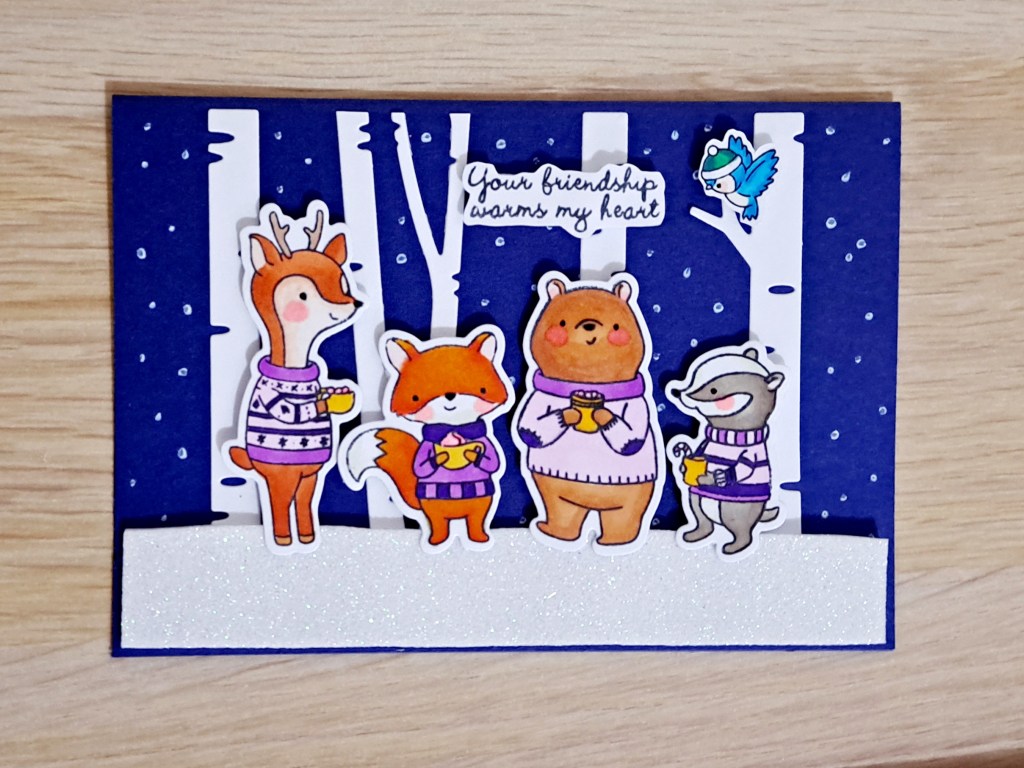
The critters on the first card were from Hello Bluebird Cocoa Party Stamp Set except for the bird which was borrowed from Hello Bluebird O Christmas Tree Stamp Set.
The background is not only versatile in terms of which stamp set to use but also for occasions. You can easily turn this everyday friendship card into a Holiday card.
The second card I made features the critters from O Christmas Tree Stamp Set and I decided to put a moon in the middle because the squirrel and the rabbit were both looking up.
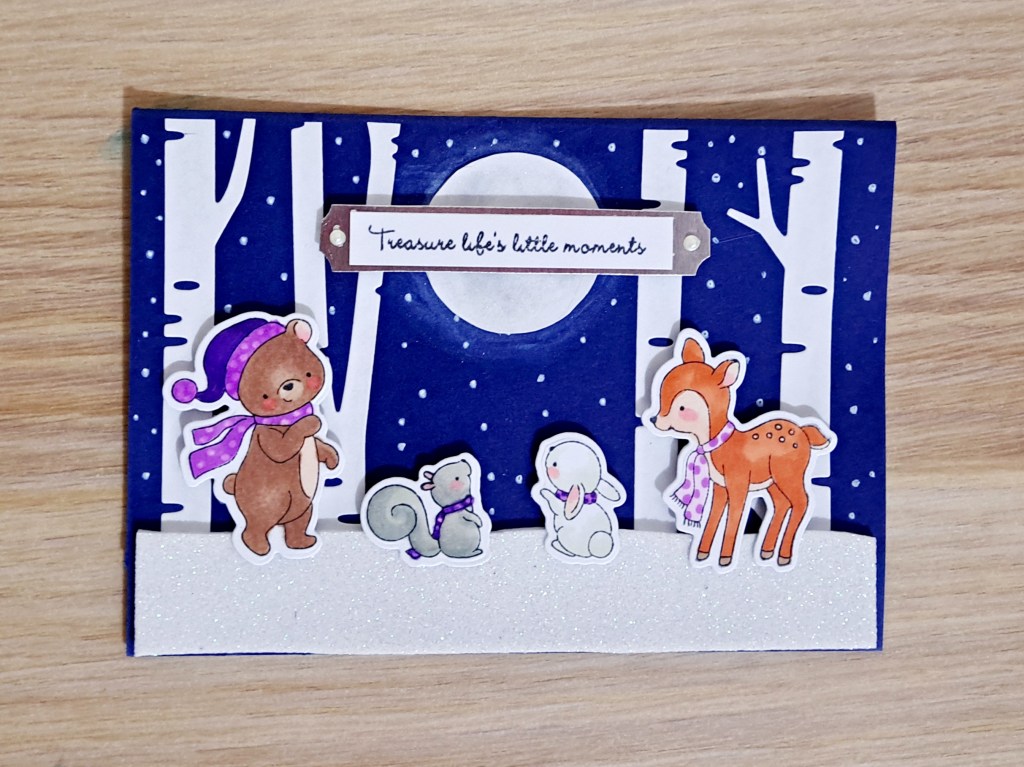
They were designed to look up at the Christmas tree but I decided that this is not going to be a Holiday card just yet, so the moon it is.
After placing the birch trees on the panel, the next thing you must place is the snow covered ground which was cut out from the white foam sheet.
I like the dimension that the foam sheet created however, next time I will use a liquid glue instead of a double sided tape to make sure that the edges are not floating.
Then use your white gel pen to create the falling snow.
Finally, this is the part where you can be as creative as you would like to be. Choose your winter themed images, color them, and place them onto the card panel to create a back story. Mine was treasuring life’s simple moments with friends.
Finally, don’t forget the sentiment. 🙂
And that’s it for my easy winter card idea! The holidays is fast approaching and I’m thinking about using this background to create festive scenes. You can try this out too and let me know how yours turn out. 🙂
See you on my next post and thanks for dropping by.
Do you want to join my Hugs in a Card happy mail list? Check out the Free Happy Mail button on my side bar to register your interest. Look for this image:

