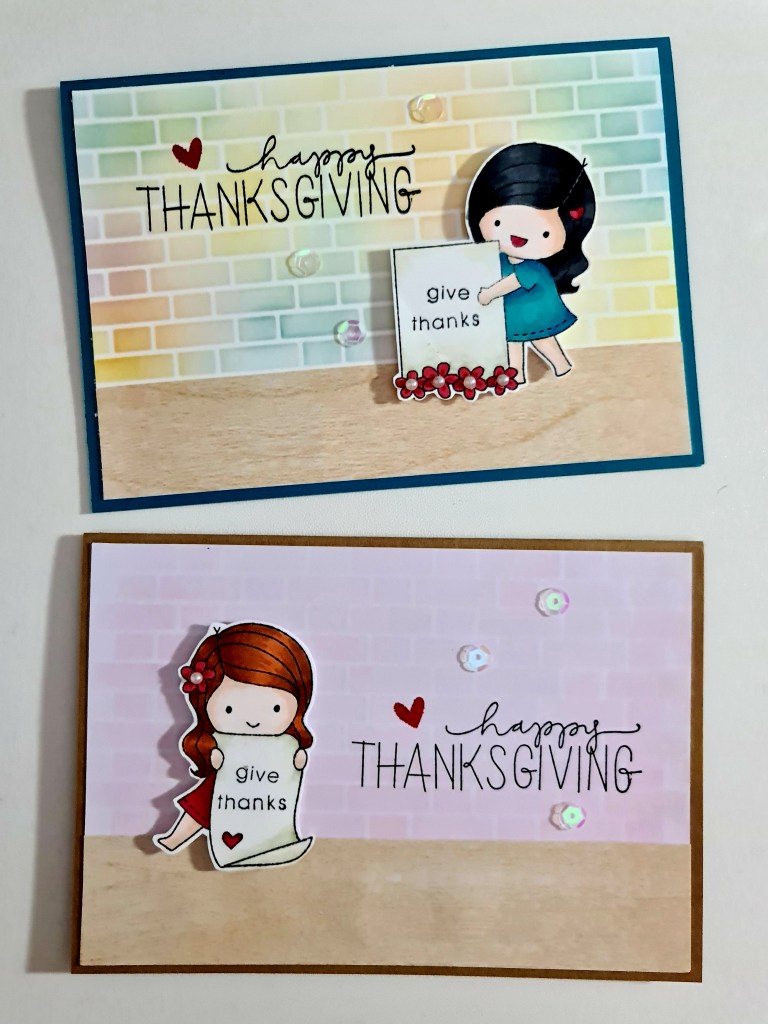
Thanksgiving cards are one of my favourite diy cards to make. Today I want to share a couple of thanksgiving card ideas featuring the cute girl from Love Cynthia stamps.
I’ll also be sharing how to make these cards. They are very easy and beginner friendly.
I’ve had the Live Like It’s Spring stamp set from Love Cynthia for a while now but I only had the chance to use it now. The stamp set includes sentiments about spring and thanksgiving.
I also used the Brick Stencil from Lawn Fawn to create the background for these cards. You can try it with a monochrome look or use complementing ink colours just like the second Thanksgiving card in pink, blue and yellow.
Two of the images in the Live Like It’s Spring stamp set are holding blank posters. I decided to use these 2 images and added the “give thanks” sentiment from Simon Says Autumn Greetings stamp set on their posters.
The large “happy Thanksgiving” sentiment was also from the same stamp set.
I created both cards simultaneously but I started with the pink brick wall background. This particular shade was Spun Sugar Distress Ink.
The second card, I couldn’t decide which color to use so I ended up mixing three inks: Spun Sugar Distress Ink, Mango Melody, and Balmy Blue. Both Mango Melody and Balmy Blue were from Stampin’ Up! I love how the 3 colours mixed up to create other shades such as teal and purple.
In the end, I think I like the second one better because it looked more vibrant than the plain pink one. It does pay to be bold with colors sometimes 🙂

Here is a closer look at the stamped images:

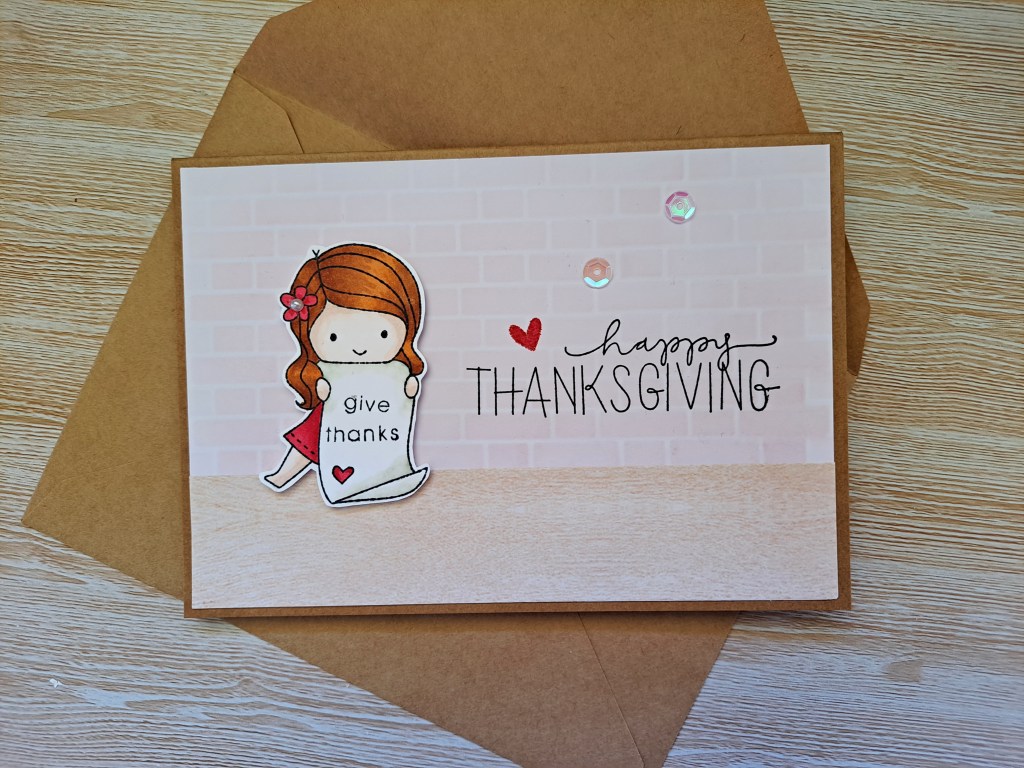
The card with the plain pink background looked pale in the beginning so I used a kraft brown cardstock to give it a bit of contrast. I used red for the dress, flower, and hearts to add more contrast to the pale background.
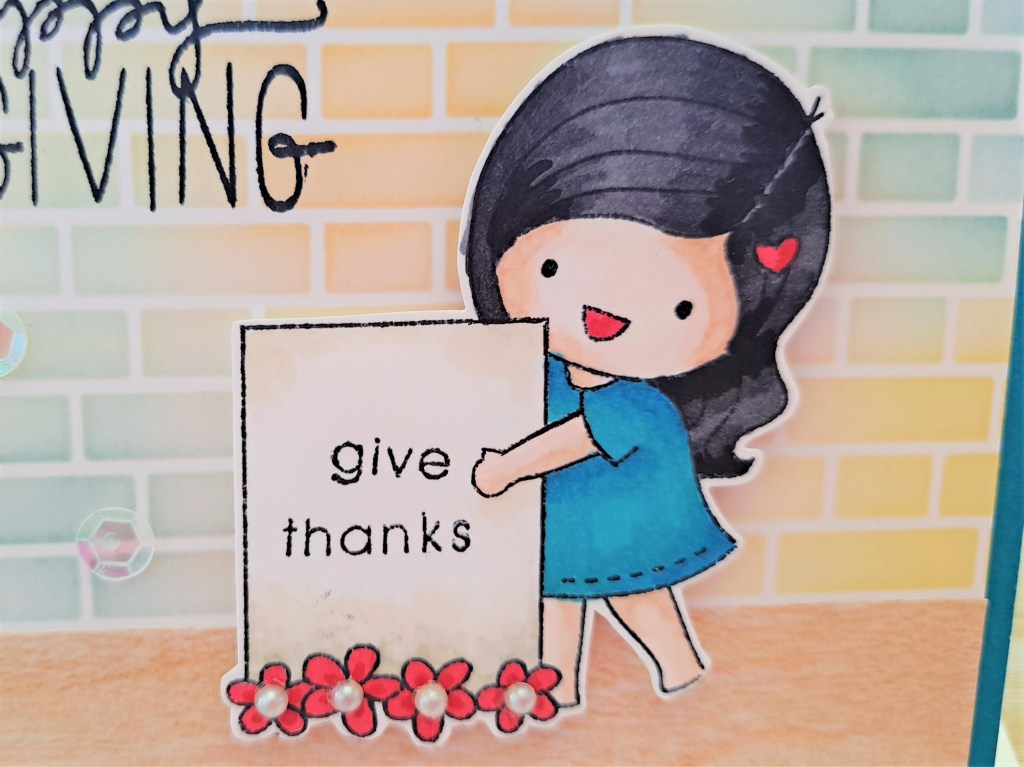
The second card went well with a dark teal card base so I decided to color the girl’s dress a matching shade of teal blue. Then the red flowers and hearts created a nice extra contrast too.
Finally, I used a stamping tool and stamped the sentiment 3 times for both cards to make sure that the sentiments are dark and crisp.

Finally, I added a few iridescent sequins and pearls for embellishments.

Overall, I was quite happy with how these simple cards turned out. Since I am planning to make Thanksgiving cards every month, God willing, I’ll definitely re-create these cards in the future.
Just a few things I’m hoping to improve on: number 1, my coloring (which is my ultimate weakness), number 2, I’ll possibly use white gel pen for highlights and to create a patchwork pattern for the dress, and number 3, to remember to add some blush on the girls’ cheeks. Hehehe.
Here is a summary of the stamps and tools I used for this design:
- Love Cynthia Live Like It’s Spring stamp set
- Simon Says Autumn Greetings stamp set
- Lawn Fawn Brick stencil
- Distress Ink Spun Sugar
- Stampin’ Up! Ink Mango Melody
- Stampin’ Up! Ink Balmy Blue
- Embellisments from my stash
- Neenah Classic Crest 216 gsm – white solar
- Kraft brown cardstock (Target)
- Quill A4 210 gsm board – Turquoise (Officeworks)
- Alcohol markers (various brands)
Thanks for visiting! Hope to see you on my next posts. You can also have a look at my previous thanksgiving cards.
Do you want to be one of our lucky Hugs in a Card happy mail recipients? Each month, I send out a FREE handmade card to some of my readers as a way of saying thank you and giving back. Click here to find out more!
