I have sent countless handmade cards before but do you know the ones that really pop? It’s the pop up cards! Oh, the surprise on people’s face when they take out a piece of cardstock and it pops up into a wonderful work of art. It is priceless!

But do you know what else is surprising about pop up cards? They are actually easy to make. It might look daunting but once you get the hang of it, you’ll be as addicted as I am when it comes to making handmade pop up cards.
Read on as I share some ideas on how to make pop up cards for any occasion!
Table of Contents:
- Pop-Up Cards for Various Occassions
- How to Make Pop-Up Cards
Pop-Up Cards for Various Occasions
Pop up cards can be made for all occasions. They serve as gifts on their own because they can be displayed on top of desks, drawers, shelves… just about anywhere you can see them.
Here are some of the favourite pop up cards I have made. For those who love diy cards, make sure to read through the end as I will be sharing easy tutorials on the different kinds of pop-up cards.
Pop-Up Card Ideas for Birthdays
Pop-up Card 1: Flower Pop-Up Box Birthday Card
I made these flower pop up box cards for my friends who had their birthdays last month. One was for a couple who celebrated their 21st year in the church. They are pretty much the same and I used the same supplies and colour-scheme for both box cards.

I used a thick white cardstock for the card base and purple ones to decorate the sides and panels of the box card. In my previous post, I shared where I buy my cardmaking supplies, do check it out if you are in Australia.
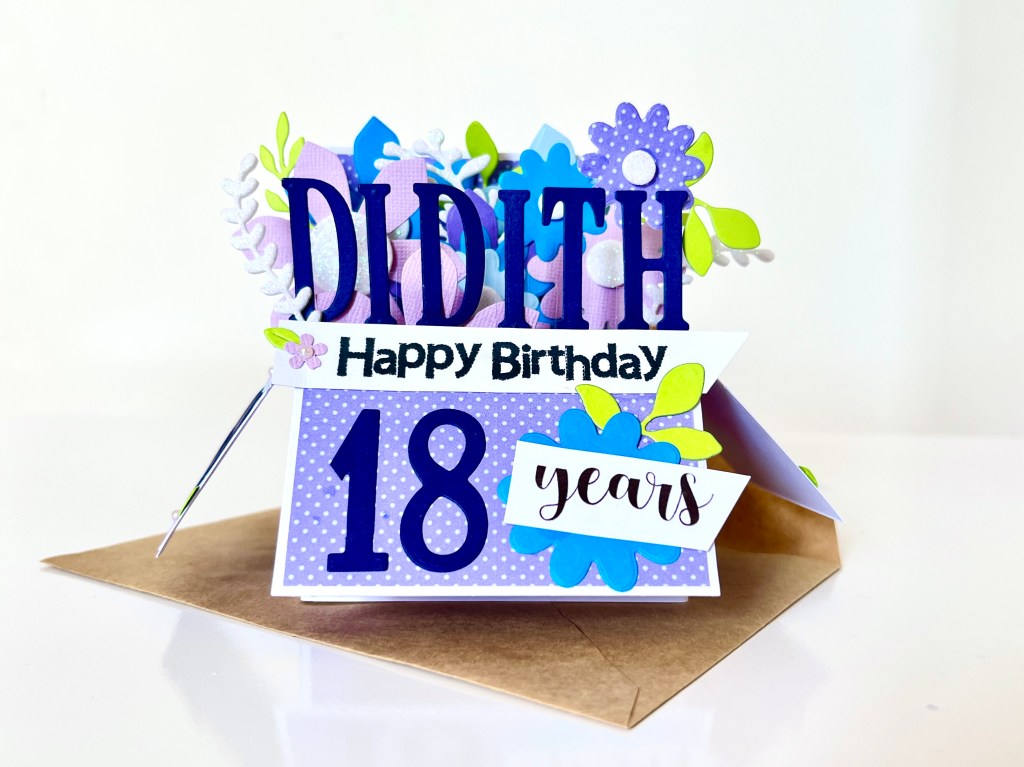
I used different shades of purples, pinks, and blues for the flowers. The colour scheme contrasted with the yellow green leaves well, in my opinion.
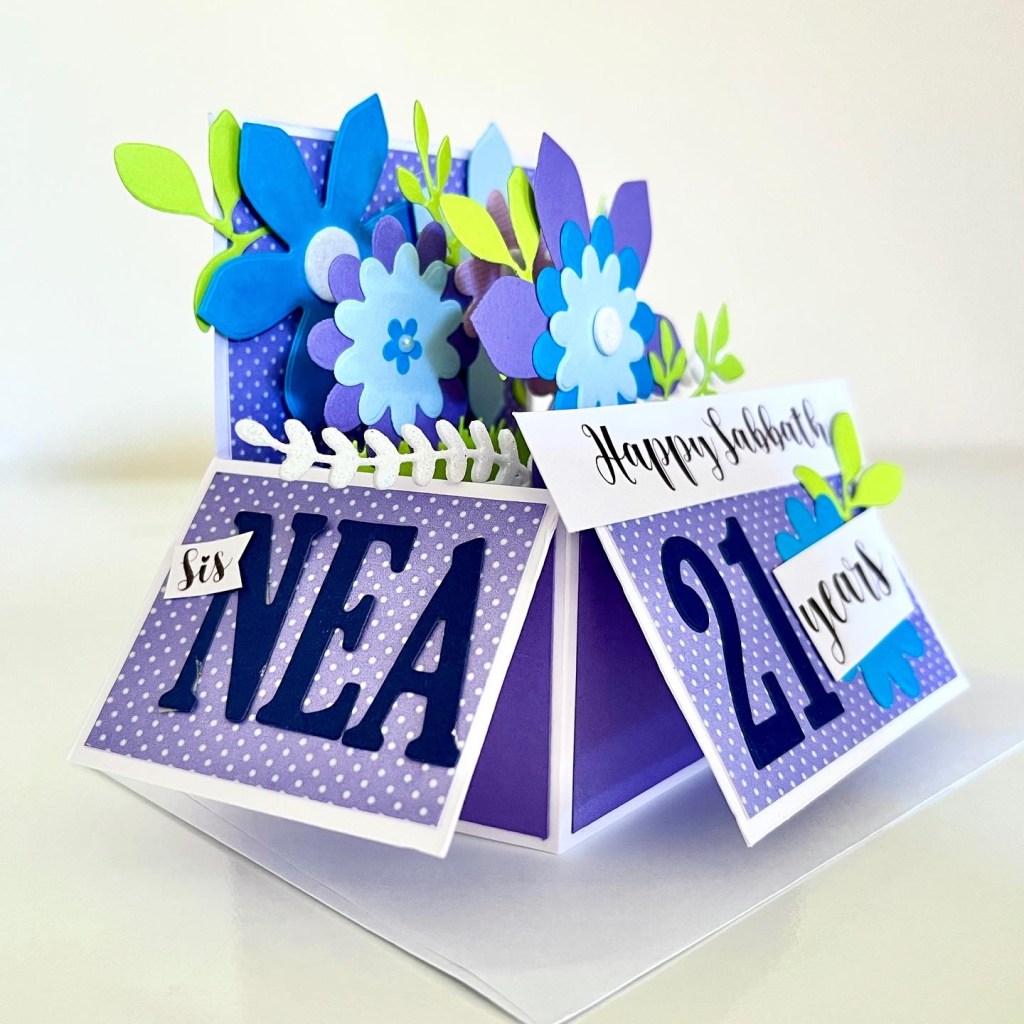
Because I wanted the letters and numbers to stand out, I used a navy blue cardstock. This pop up card design suits well for birthdays as well as anniversaries.
Pop-up Card 2: Shadow Box Under the Sea Birthday Card
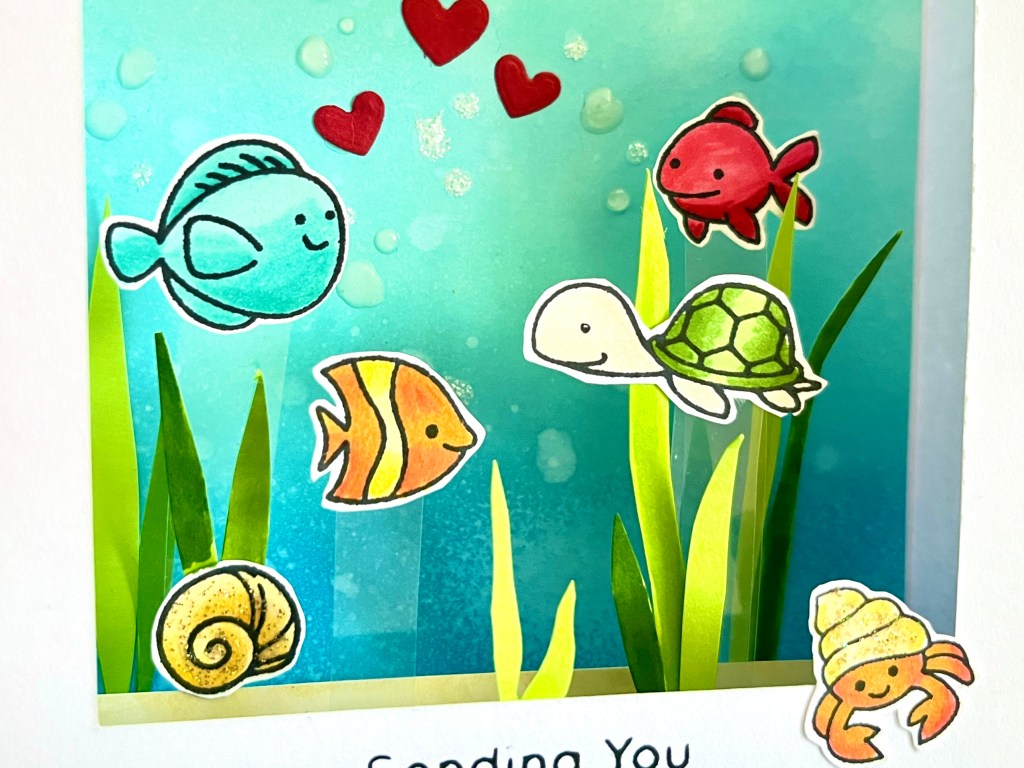
Another pop up card I made for a birthday occasion is a shadow box card with an under the sea theme. A shadow box card is very similar to a pop-up box card, they also have tabs inside to create dimension.
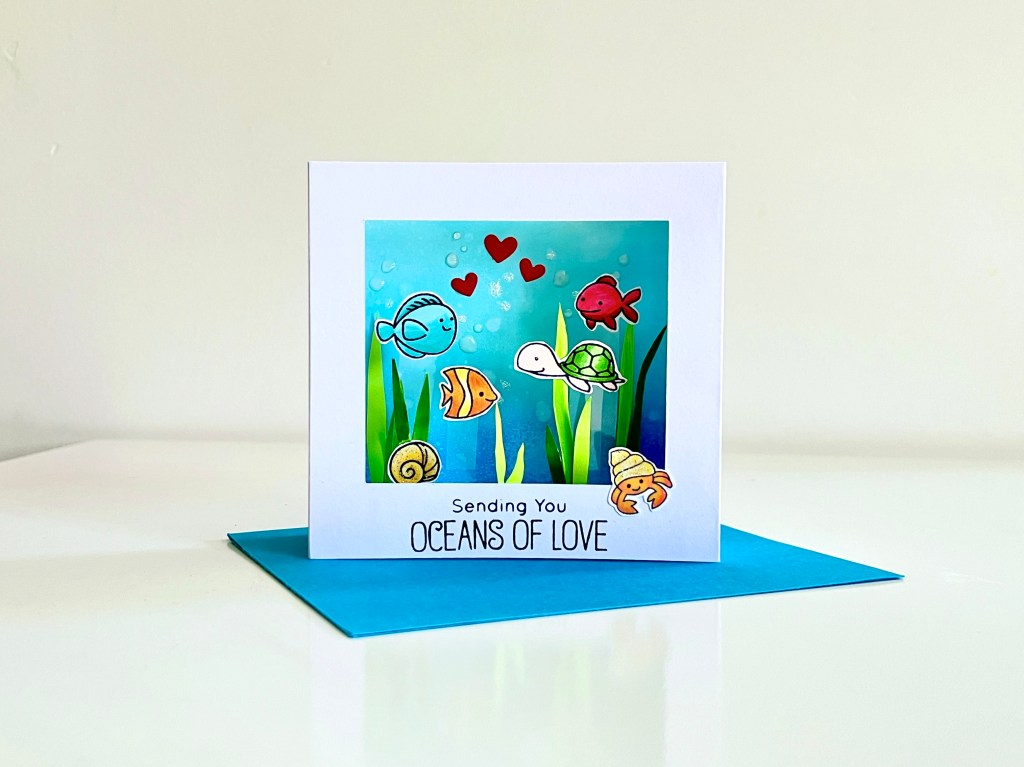
A shadow box card is versatile. You can make one for any occasions and with any stamp and die sets you have available.
You can create scenes like under the sea, such as this one, or nature scenes with mountains and skies, or even a home scene with cozy wallpapers and picture frames at the back panel.
This is a good type of pop-up card to make if you have endless ideas. You can definitely come up with a design with whatever supplies you have in your stash right now.
Pop-Up Card Ideas for Thanksgiving
Pop-Up Card 3: Inside Pop up Camping Theme Card
I made this inside pop-up card for my friends in church. All 3 family of us recently went for a camping trip and it was superb!

An inside pop up card can also be customised for all occasions. For this specific design, I used a kraft brown card base as it looks mostly like a camping ground.
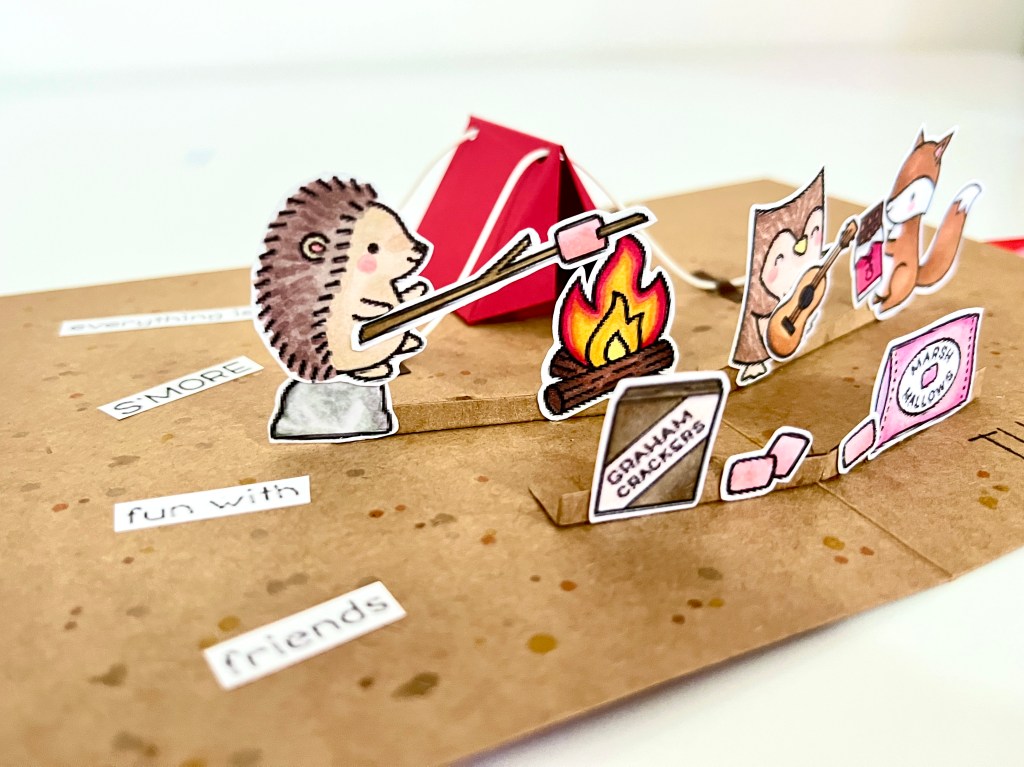
I used bold and bright colours for the tents, which matched with the outside of the card as well the ribbons.
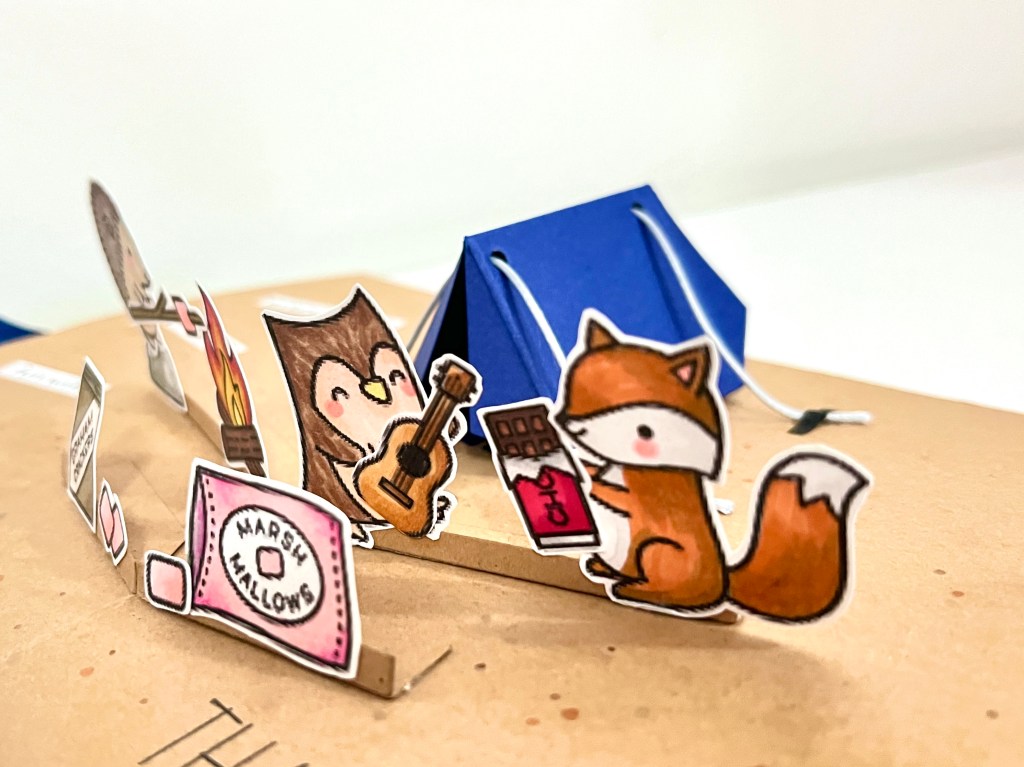
This pop up card design is perfect for the outdoor-lovers. One of my friends liked it so much she asked me to make one for her husband’s birthday. It is very versatile, in fact, I’m thinking about making one for Father’s Day too!

Pop-Up Card Ideas for Wedding
Pop-Up Card 4: Inside Pop-Up Wedding Card
I have a friend at work who will be attending several wedding events in the near future and so I made these pop-up cards for her.
This particular pop-up wedding card is similar to the camping themed thanksgiving card I made earlier. You open the card fully and the elements stand out to create a 3D scene.
This pop up card design is clean and white just like most wedding cards.
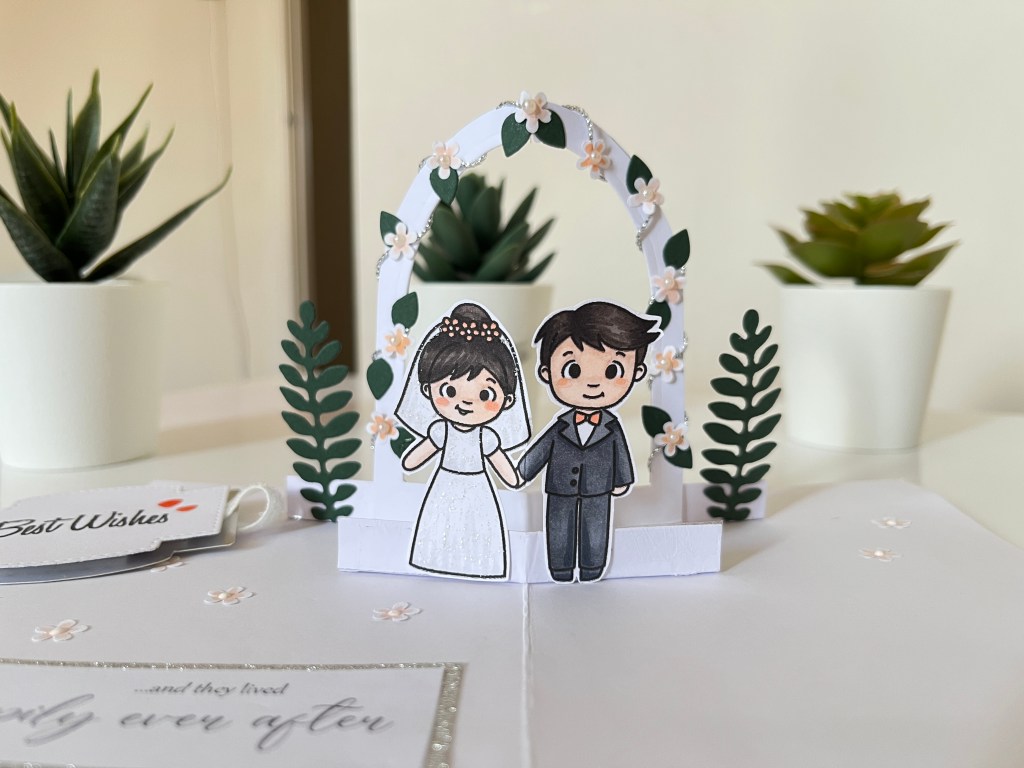
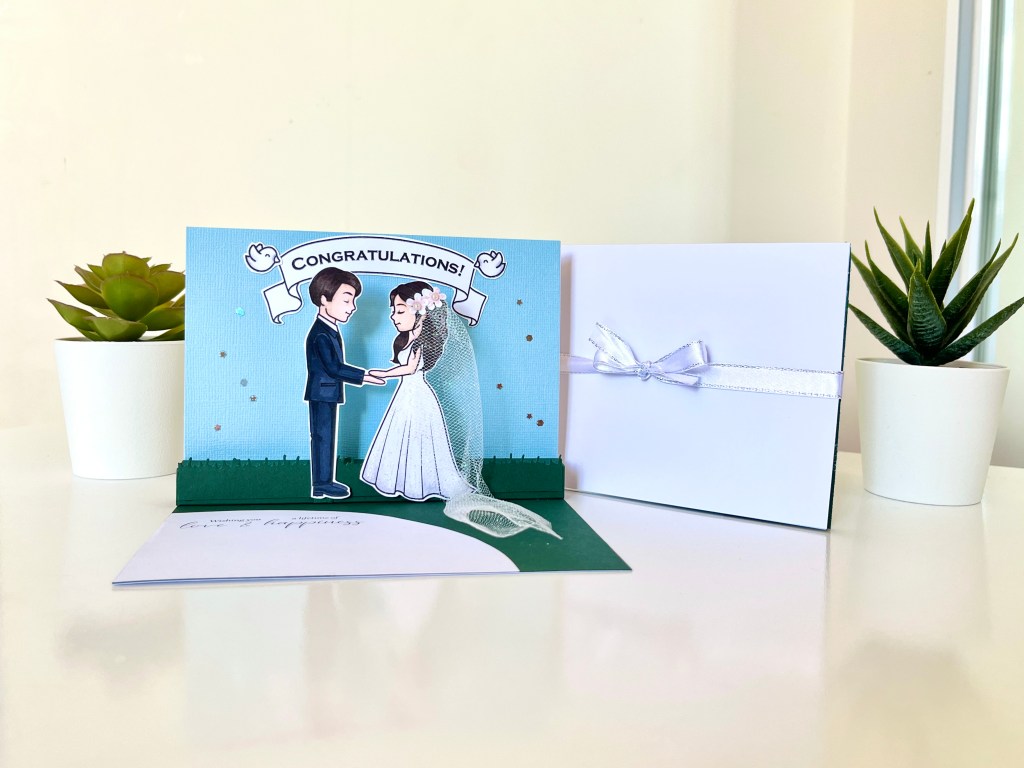
Pop-Up Card 5: Inside Half Pop-Up Wedding Card
I call this half pop-up because the card does not open all the way out like the previous example. Instead, it opens just 90 degrees, so the pop-up card looks like it has a wall and a floor.
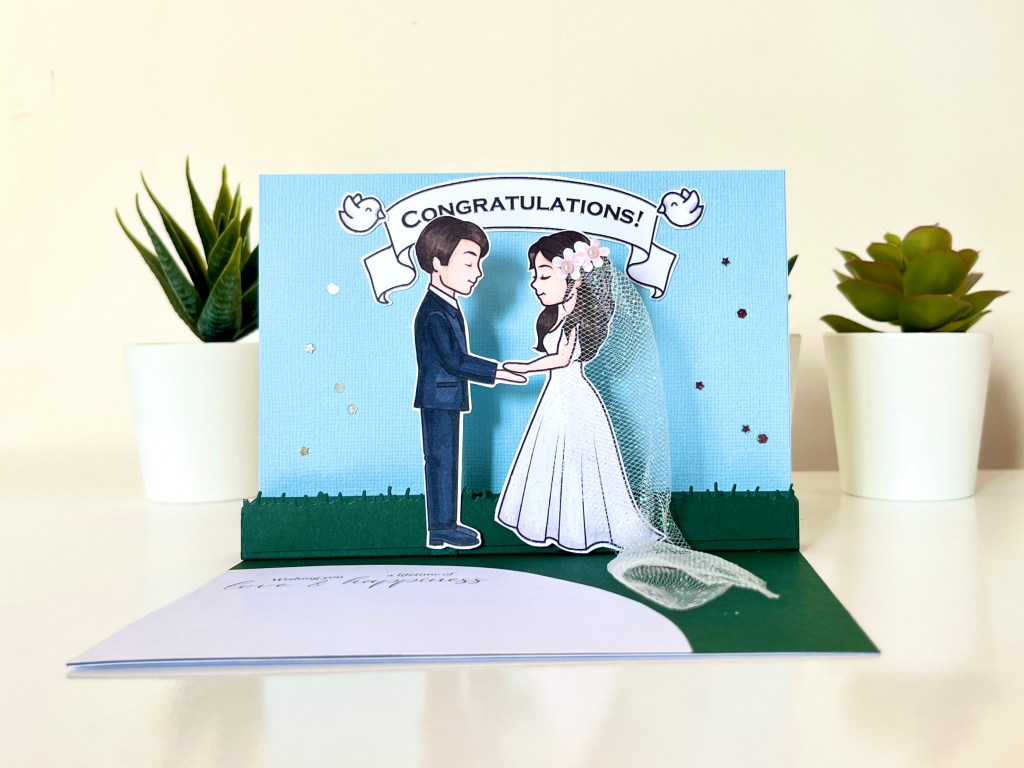
This is another wedding pop-up card design which I made as a request from a friend. I used a tulle ribbon to make the girl’s veil look real and then I brushed her dress with Clear Wink of Stella brush pen for some sparkle.
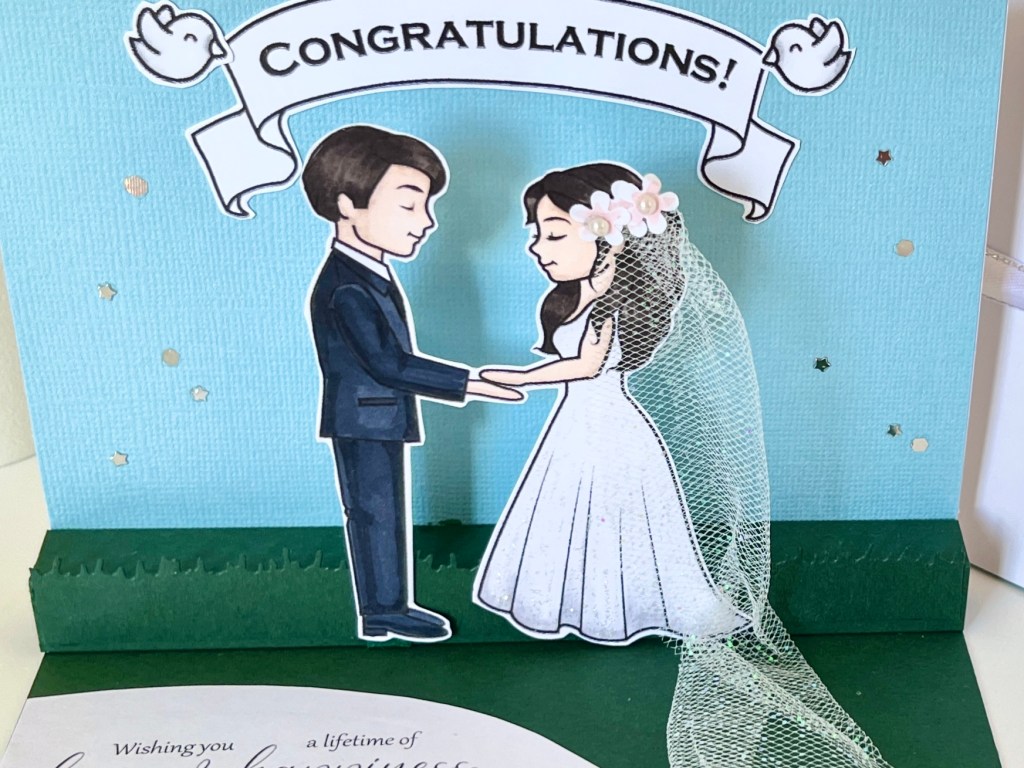
The sentiments on the ground were printed so I can select the messages myself.
This design was also well liked by my friends and so I made more for so many wedding ceremonies.
Pop Up Cards Ideas for Valentine’s Day
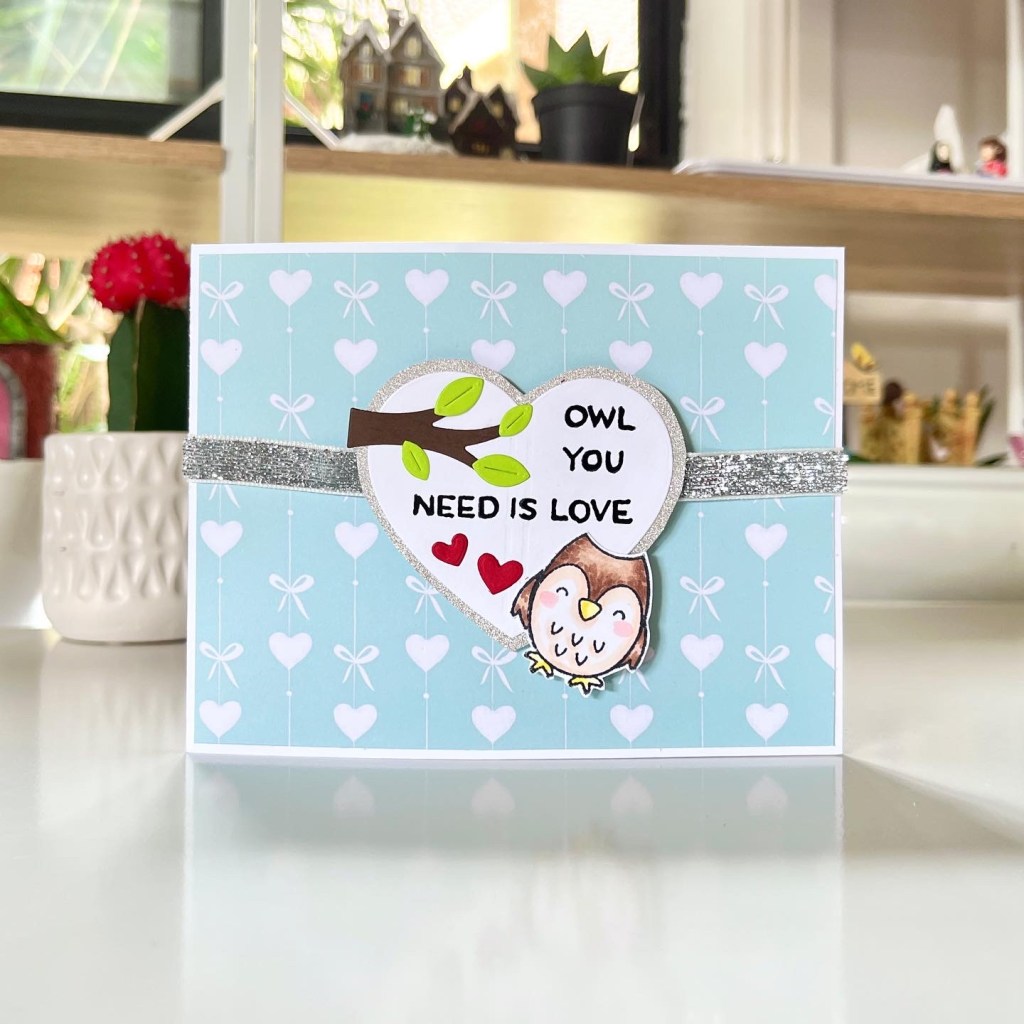
Pop Up Card 6: Pop Up Centre Fold Valentine’s Day Card
This next example is another fun fold pop-up card. From the outside, it looks just like any ordinary handmade card but once you open it, the centre pops out into a window with 3D scenes.
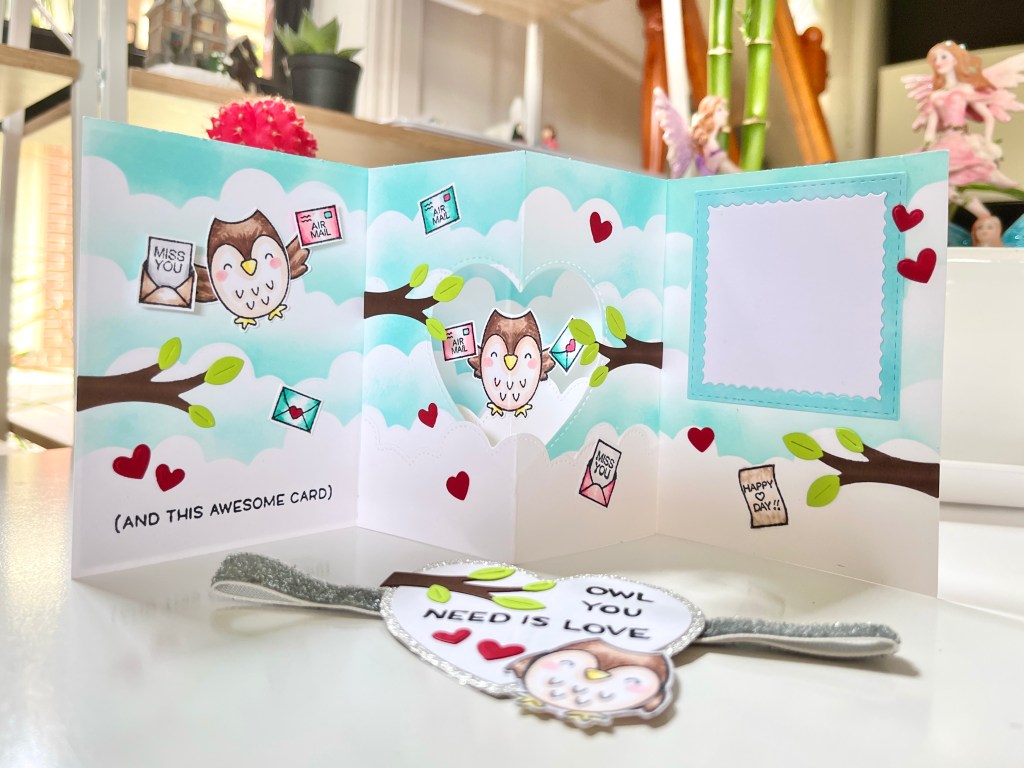
A centre fold pop up card is fun to make and you can also customize it for any occasions you want.
How to Make Pop-Up Cards
As I have said earlier, despite the wow factor of pop up cards, they are actually very easy to make. Once you have your own pop up card template, you can come up with different ideas and the designs are endless, your only limitation is your imagination.
In the following tutorials, I will show you how to make the basic templates for the different kinds of pop-up cards. Once you get the hang of them, you’ll be making pop up cards by the hundreds!
Make sure to also visit my Hugs in a Card YouTube channel to watch this easy video tutorial I made on how to make pop-up cards!
Pop-Up Box Cards
Pop up box cards are called such because they literally pop into a box shape once you take the card out from the envelope.
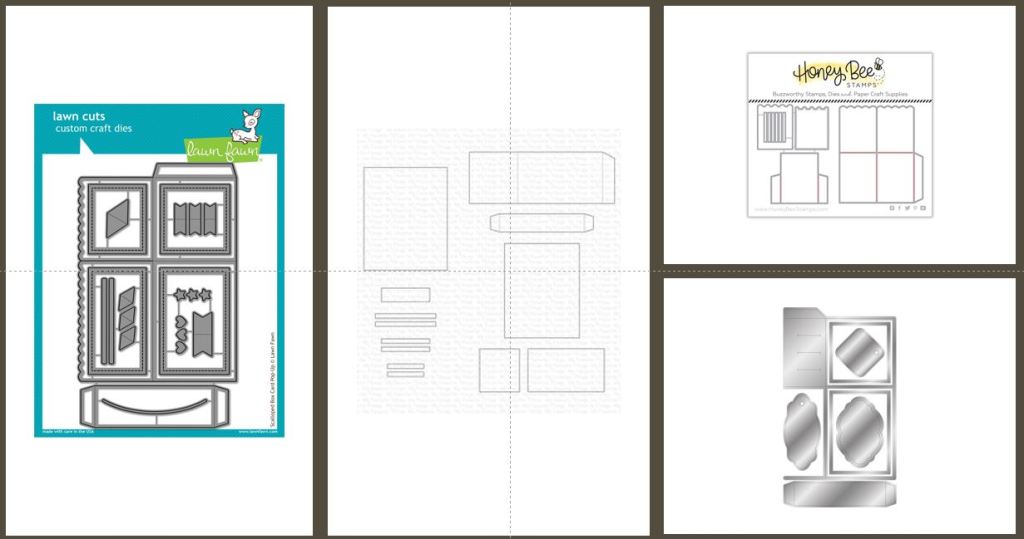
There are several cutting dies available to make the job easy such as:
- Scalloped box card pop-up die from Lawn Fawn
- Outside the box die-namics from MFT Stamps
- Gemini dimensionals pop-up box base dies from Crafter’s Companion
- A2 surprise box card base from Honey Bee Stamps
But you can still make one even if you don’t have die cuts. Here I’ll show you an easy tutorial how you can make a pop up box card without using any dies:
First, cut an A4 sized cardstock lengthwise, just like the picture below:
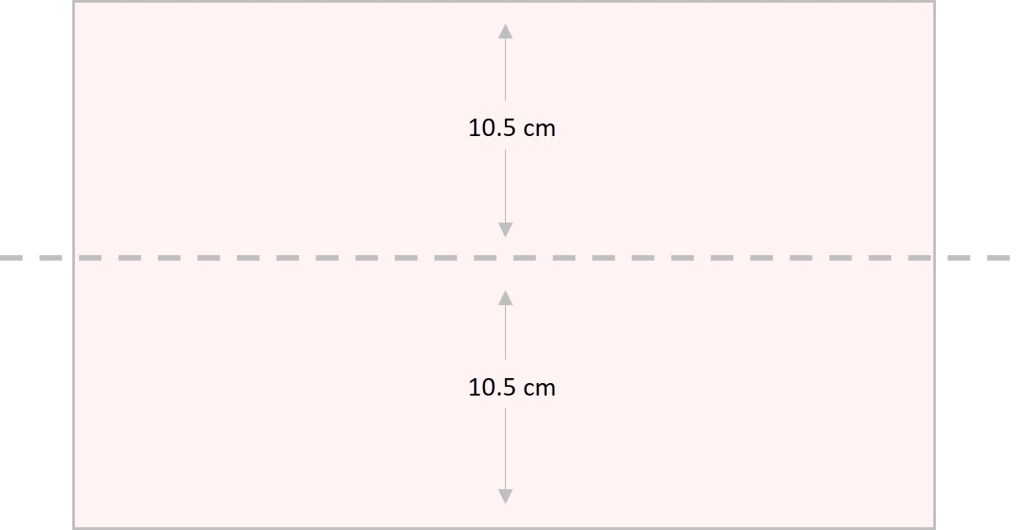
Set aside one of the halves. We will use this for our shadow box card later. For the other half, you’ll have to make creases and cuts just like in the illustration below:
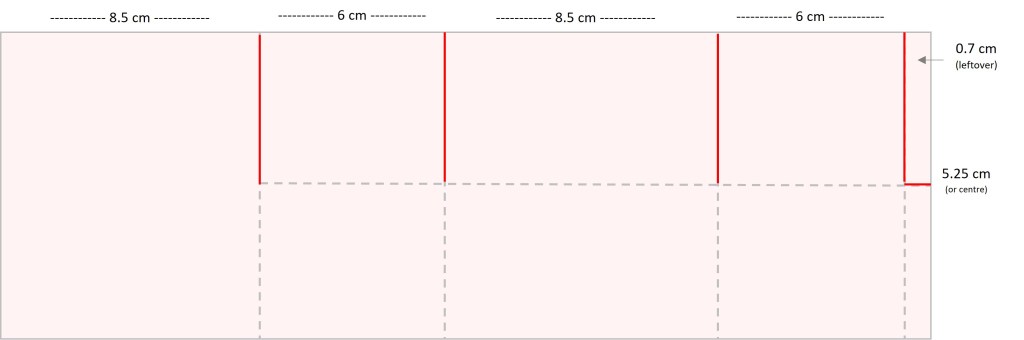
Start with the vertical folds. The measurements may look daunting but the pattern is 8.5cm and 6cm, alternately. Don’t worry about the 0.7 at the end. It’s just the leftover and will turn out to be the tab that will attach the ends to close into a box.
Create another horizontal crease at 5.25 cm. But do not crease all the way through. The leftmost part which is 8.5cm wide should not be folded – this is the part that acts as the back panel and we don’t want creases on it.
Cut the vertical folds halfway to make the flaps of the box. Now you can close the box.
Fold the little tab inside and put some double sided tape. Then fold the card over so that the end meets the tab with the sticky tape. Once the ends are stuck together, your box is complete and you’re ready to add in your other elements!
Don’t forget to add at least 2 tabs as inserts inside your box. This is the element in your pop up box card that creates the dimension. You can use scraps of leftover cardstock for the inserts. Make sure to check out the video to see how easy the process is.
Inside Pop Up Card With V Fold Mechanism
This is one of the easiest pop up cards to make. You will only need the V Fold Mechanisms attached, and you’re done. Literally! You can start decorating once you have this part done.
To make the V Fold Mechanism, you’ll need a tab that measures at least 2cm wide and 8cm long. You can modify the length on your other cards but for this tutorial, let’s start with an 8cm long tab.
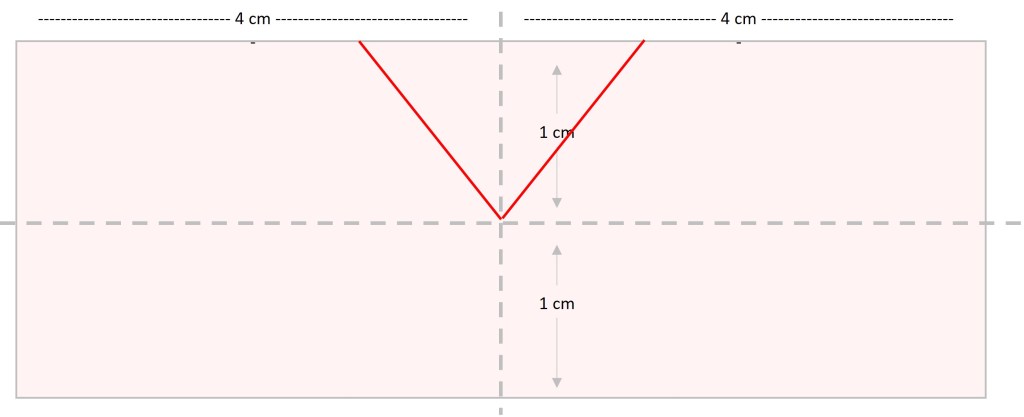
Add double sided tapes on the sides of the V cut.
To attach the V Fold Mechanism, start with one side first. Make sure that the point of the V is aligned with the middle crease of your card base. Position the tab on one side of the card slanting slightly before attaching.
Then fold over the tab, release the backing of the double sided tape, fold over the cardbase and it will attach nice and straight.
Open your cardbase and the V fold mechanism starts working! You can now attach your stamped images.
There are also products available so you can make a V Fold Mechanism easier such as the Pop Up Base Dies from Concord and 9th.
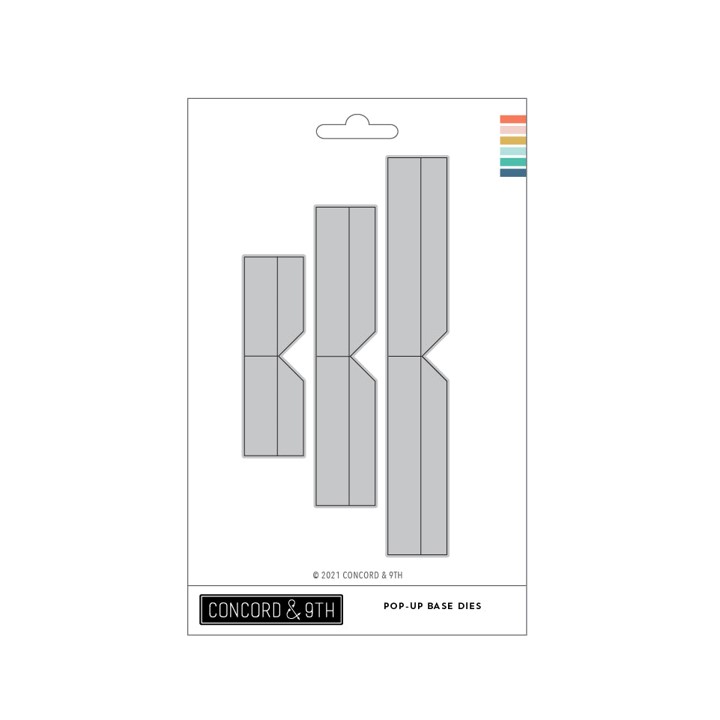
The dies create the creasing and cutting of V so all you have to do is add the double sided tape and attach to your card.
Shadow Box Pop-Up Card
A shadow box pop up card is very similar to a pop up box card. So the first step is also to cut off an A4 cardstock lengthwise into 2. But since we have already cut out an A4 sized cardstock previously, just take out the other half and crease accordingly.

Fold the end tab over and add a strip of double sided tape. Then fold the entire card over so that the leftmost edge meets the tab with the tape. Once it’s attached, your shadow box card is ready and you can now add in your elements.
In my example of shadow box card above, I made a separate panel for the background and just attached it after I have coloured the panel with distress inks. And then I added 2 tabs as inserts. I also used little pieces of acetate to attach the stamped images of fishes so they would like “floating.”
There are also several dies that can make the task easier. You can purchase different brands such as:
- Shadow box card dies from Lawn Fawn
- Big shadow box dies from Heffy Doodle
- Shadow box die-namics from MFT
Inside Half Pop Up Card With Internal Stand Mechanism
There is no specific measurements when making an internal stand mechanism for an inside half pop up card. This is because the mechanism will greatly depend on what images you are going to use for your pop up card.
For small images, you will need small stand mechanisms too. But for wide ones, like the grass on the wedding card I have as an example above, you can use a stand mechanism that measures as wide as the entire width of your card base.
In the video I shared, I made an example for making a tab for smaller images. Make sure to watch it to get an idea how to attach your tabs correctly so they align and work perfectly when you open and close the cardbase.
Share Your Pop-Up Card Ideas With Us!
Did you find pop-up cards amazing? Now that you have learned how easy it is to make pop-up cards, it’s time to unleash your creativity into action!
Don’t forget to visit our and like our FaceBook Page at Hugs in a Card, so you can share photos of your beautiful creations.
Do you also want to receive some Hugs in a Card happy mail? Each month, I send out a FREE handmade card to at least one of my readers as a way of saying thank you and giving back. Click here to find out more!

14 thoughts on “How to Make Pop-Up Cards: 6 DIY Card Ideas”